What Is The Casing Technique?
Published : March 11th, 2019

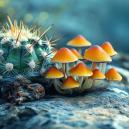
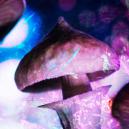
Casing focuses on creating the optimum environment for growing large quantities of mushrooms. When it comes to magic mushrooms, this means an enormous amount of psilocybin-rich fungi for you to harvest. Keep reading for a complete guide on how to master this essential technique. Once you do, you will never look back.
WHAT IS THE CASING TECHNIQUE?
The difference between buying regular soil, and creating a “casing” layer is that the latter uses a significant amount of materials to create the ideal medium for fungi production.
Typically, a casing layer and your inoculated brain cakes are combined in a large, rectangular tub to maximise output. For any serious psychonauts out there, this is a must-know technique for an endless supply of magic mushrooms. The preparation isn’t too tricky, with all items available at your local garden centre or at your home. Casing uses a very similar medium to substrate jars, but this time we are going big.
Before we jump into our step by step guide, we need to prepare our substrate jars.

PREPARING SUBSTRATE JARS
We already have a comprehensive guide on how to extract and prepare mushrooms spores here. If you haven't done this yet, the entire process takes roughly a month, although depending on conditions it can take longer for complete inoculation. Without going over the same information, we will quickly recap the process of preparing substrate jars.
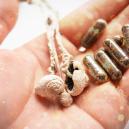
- Extract mushroom spores, carefully storing them in a spore book.
- Prepare your substrate jars by using a mixture of sterilised vermiculite, brown rice flour and water.
- Next, we need to inoculate our spores by placing them inside the substrate jars until they are baked. Once prepared, you should notice a fluffy white mycelium build inside the jars.
- Normally, at this stage, we would move the mycelium cakes to a small plastic container and begin the fruiting process. Instead, it’s time to prepare our casing layer.
STEP BY STEP GUIDE TO CASING

EQUIPMENT
- Isopropyl alcohol/disinfectant wipes
- Large plastic container (preferably with a lid, and roughly 6 inches deep)
- Kitchen foil (if your container doesn't have a lid)
- Large mixing bowl
- Large cooking pot with lid
- Oven-proof temperature probe
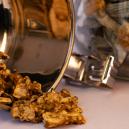
- Vermiculite
- Brown rice flour
- Water
IMPORTANT NOTE
The exact quantities of vermiculite, brown rice flour and water will vary depending on the size of your container. However, regardless of size, always make sure that you maintain the ratios 3:1:1 (in the order stated above). You will need to prepare enough to give you at least a layer 5cm deep. This will ensure the mycelium has enough space to cultivate.
STEP 1
To begin, we need to sterilise our container. Using either the isopropyl alcohol or disinfectant wipes, completely wipe down the inside and outside of your plastic container. We don’t want to ruin the entire process by contaminating our substrate.
STEP 2
Using the large mixing bowl, combine the vermiculite, brown rice flour and water in the ratios referenced above. Add water in between, alternating vermiculite and brown rice flour. Mix gently until you have reached the desired amount of substrate.
To test you have followed the correct ratios, lightly squeeze the substrate in your hand. If a few drops of water ooze between your fingers, then you have achieved the right consistency. If water pours from your hand, then more vermiculite and brown rice flour are needed.
STEP 3
Transfer the contents of the mixing bowl to the large cooking pot. Place inside the oven and leave for an hour at 60–70°C (140–158°F). This will pasteurise the soil and remove any contaminants. It is essential the soil is heated all the way through. Probe the soil after one hour to ensure the core has reached the required temperature, if it has not, put it back in the oven and repeat as necessary.
STEP 4
Remove your brain cakes from their substrate jars and gently break them apart with your hands. Spread evenly along the bottom of your plastic container. Gently pour the casing layer over the top of the mycelium substrate. Mix both mediums very carefully by hand and ensure an even spread.
The casing layer should be ¼”–½” thick. Anything over ½” will delay colonisation times.
STEP 5
With everything prepared and mixed, all that remains is covering the container with a lid or a layer of kitchen foil. It can then be stored in a dark place at room temperature. For best results try to maintain a consistent temperature of 20–27°C (68–82°F).
STEP 6
After a week or so, you should notice white fur beginning to build. This is your mycelium taking shape. Continue checking the container on a weekly basis until the mycelium covers the majority of the soil. Once it does, move the container (remove the lid) to an area with indirect sunlight, clean air flow and slight humidity.
STEP 7
Now we wait! Before too long you will have a container brimming with magic mushrooms. Once they are ready to be harvested, the only question you need to ask yourself is: do you want to share your psychedelic trip?