How To Extract Spores From Mushrooms
Published : January 21st, 2019

Harvesting your own magic mushroom spores provides the raw material for an endless supply of psychotropic home-grown! Follow these easy teks for abundant flush after abundant flush of your favourite genetics from your friends at MushMagic.
HOW TO EXTRACT SPORES FROM MUSHROOMS
Appropriately, the spore print from a mushroom looks entirely like the iris and pupil of a disembodied eye.
- The making of spore prints has a number of benefits:
- You have the means to make more mushrooms in the future.
- You get to keep genetics that you enjoy in your personal spore library.
- You get to enjoy a variety of characteristics, rather than growing a phenotypic clone.
- They can be done on-the-run if you stumble upon something interesting in your travels (whether it be from friend’s shrooms or novel phenotypes in the wild).
MUSHROOMS MEAN FERTILITY
A single spore print contains literally millions of individual spores. Mushrooms are analogous to flowers. They are the fruiting, above-ground bodies of the subterranean species mycelium. The spores produced by mushrooms are borne on the wind, various creatures, and water runoff to new locations. The mycelium, which is the vegetating part of the fungus, spreads into new niches and novel surroundings—ready to do it all again.
MYCELIUM SUPPORTS LIFE
Mycelium constitutes a substantial amount of our planet’s biomass. It is responsible for decomposing plant matter and is needed for living plants to grow properly, making mycelium largely responsible for carbon cycling.
While wild mycelia are busy being legends in the great outdoors—cycling carbon, ensuring friability and water retention of soil, and helping make nutrients available to plants—you can have a steady supply of select domestic mycelia of your own. In a matter of time, they will produce the sickest, psilocybin-rich mushrooms from a cupboard in your house—cycling creativity, ensuring “fry-ability” and vision retention, and helping make insights available to our brains.
HYGIENE REALLY HELPS
Making a spore print couldn’t be easier. But first, a note on cleanliness.
Remember to be as clean as possible when dealing with the propagation of fungi. The conditions you create for your personal supply of friendly fungus are just as nice a home for unfriendly fungus:
- Clean surfaces well.
- Spray the immediate air with a sanitiser.
- Wash all the tools you use with soap and water, then sterilise.
- Spraying with alcohol is a good way to ensure sterile gear after a brisk wash.
- Put blades and other metal tools like tweezers through a flame and let cool.
- Clean yourself; have a shower, brush your teeth, and put on some clean clothes.
- Basically, if it is going to come into contact with, going to be in the vicinity of, going to contain, or going to be used to grow mushrooms—clean and sterilise it.
- A well-scrubbed kitchen sink is a handy place to work. They are designed to drain and the stainless steel is easy to scrub and disinfect. This makes it much easier to create a sterile field to work within.
Yes, it does seem awfully pedantic, but an infection by a competing organism can cause the loss of whole flushes.
MAKING A SPORE PRINT
Making a spore print is very easy and, depending on the size of the print, can furnish you with enough raw material for anywhere up to 100 active inoculations.
WHAT YOU WILL NEED
- Mushroom of choice
- Sterilised blade/scalpel
- Piece of paper for print (or suitable alternative)
- Cup/glass/bowl
- Sterilised tweezers
- Zip-seal bag
- Alcohol
- Masking tape
INSTRUCTIONS
At its simplest:
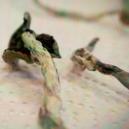
- Use a sterilised blade to remove a well-laden mushroom cap.
- Set the cap on a clean piece of paper. Pre-cut the paper to fit a zip-seal baggy.
- Cover the cap with a cup, glass, or small bowl.
- Wait 24 hours.
- Remove the cap. Admire the art of the spore print.
- Using sterilised tweezers, move the print into the baggy and seal.
- These spore prints will last for years in a cool, dark place.
- If you want a more permanent solution to paper, a number of materials can be cut to size to fit inside the baggy or be used to make a resilient spore book. Glass, melamine, perspex, stainless or powder-coated steel, in fact any durable and smooth surface can be used to store a spore print.
- To make a spore book, you will need two pieces of your chosen material cut to the same size, washed well, and wiped with alcohol.
- Use some masking tape to make a hinge along one edge. Place a cap on each leaf and repeat the spore-printing process above.
- Close the spore book and securely seal the other three edges with masking tape as well.
This will also keep spores for years when stored somewhere cool and dry. Make sure you mark the cover of your spore books with all the relevant strain information.
NOW THAT I HAVE MY SPORE PRINT, WHAT’S NEXT?
First, you are going to want to make some spore syringes and store them and your spore print well. Following this tek will make sure you have some spore syringes ready to go. After making some syringes, a spore print will keep for months when left inside a well-sealed baggy in the fridge or a cool, dark place.
TURNING SPORES INTO MORE SPORES
“We plant the seed, nature grows the seed and we eat the seed and then after that, we sow the seed, nature grows the seed and we eat the seed...”. — Neal, The Young Ones
This how-to is based on Robert McPherson’s well-respected PF Tek, which helped usher in the modern, user-friendly way to grow mushrooms at home. The key innovation was adding vermiculite to the standard all-grain substrate. This made the grain more friable, which created more surface area and spaces in which mycelium could grow. This tek is a little bit labour-intensive, and aside from buying a pre-prepared shroom kit, is the easiest and most suitable for the home psilocybin enthusiast.
There's nothing terribly complex about this two-part tek. In Stage 1, you make a substrate: Mix together vermiculite, brown rice flour, and water, and distribute evenly between some glass jars. Inoculate this mix with your spore syringe and wait for mycelium to develop. After a few weeks, they will have developed well. Stage 2 is placing the mycelium cakes in a friendly environment and waiting for mushrooms to grow. When mushrooms are ready, pick them, but leave a few to mature and develop spores so you can begin again.
WHAT YOU WILL NEED FOR STAGE 1
- Spore syringes
- Vermiculite fine or medium
- Brown rice flour
- Drinking water
HARDWARE FOR STAGE 1
- Measuring cup
- Mixing bowl
- Strainer
- Tin foil, the thicker the better
- Large cooking pot with lid or a pressure cooker
- Small clean towel or ten squares from a roll of paper towel.
- 12 shoulderless 500ml glass jars with well-sealing lids or mason jars
- Hammer and nail or hole punch
- Micropore tape
HYGIENE SUPPLIES
- Rubbing alcohol or isopropyl alcohol from a hardware store
- Butane lighter or a propane torch if you have one
- Surface disinfectant or use the alcohol
- Air sanitiser
- Sterile plastic or latex gloves
- Face mask
HOW-TO FOR STAGE 1
- First, wipe the hammer and nail down with alcohol. Then, use them to punch four holes evenly around the circumference of each lid. 12, 3, 6, and 9 o’clock will do just fine. Come in a bit from the edge so the lid doesn’t get misshapen. Put the lid on a piece of wood and hammer the nail from the inside surface of the lid.
- For each jar, thoroughly combine ⅔ cup of vermiculite with ¼ cup of water, and drain the excess using the sterilised strainer. Add to this damp mix ¼ cup of brown rice flour.
- Add the completed mix to the jars. Each jar should be filled to within 1.5cm of the rim. Be careful not to pack the mix too tightly.
- Sterilise the top surface of the mix with a spray of alcohol, and then top up to the lip of the jar with dry vermiculite.
- Screw the lids on. Be sure they are tight.
- Cover each jar with tin foil. Make sure the foil is fitted snugly. The idea is to stop water and condensation from getting through the holes you so accurately punched in the lids.
- Put the small towel or the leaves of the paper towel in the bottom of the large saucepan. Preventing the jars from touching the bottom of the pan prevents them from cracking or shattering.
- Fill the pan with water until halfway up the jars, then bring to a slow boil. Be sure the jars remain upright and the heat isn’t so high that they dance and bounce into each other too hard.
- Put the lid on the pan and leave to boil and steam for 75–90 minutes. Check to make sure the pan doesn’t boil dry, and add more water if needed.
- If you are using a pressure cooker, use the same procedure, only give it 15psi for an hour.
- After the allotted time period, let the pan of water and the bottles stand to cool. Overnight is preferable. Everything, the jars and substrate especially, needs to be at room temperature.
INOCULATION
- Use the lighter or butane torch to sterilise the syringe needle by heating its entire length until it glows orange hot. Once it has cooled, spray or wipe it with alcohol. Do this the moment you are ready to inoculate a jar. Don’t leave the syringe sterilised and waiting while you get things ready.
- Draw the plunger back slightly and shake the syringe to evenly distribute the spores.
- Remove the foil from the first jar and stick the needle through one of the lid holes as deep as it will go, angled towards the glass side of the jar.
- With the needle gently touching the glass wall of the jar, inject 0.25cc (ml) of the spore solution.
- Do the same for each of the three remaining holes, cleaning the needle with an alcohol wipe in between each injection.
- Cover the lid holes with micropore tape and set aside.
- Repeat the process until every jar is inoculated. It is important to re-sterilise the needle with the flame and wipe again with alcohol after each jar is inoculated.
BAKING BRAIN CAKES
- Put the jars in a secure and clean place where they won’t be disturbed. Keep them out of direct sunlight and at a maximum temperature of 26°C.
- After 7–14 days, fluffy white mycelium will start to spread outwards from the inoculation sites.
- This is when you find out how clean you have been. Keep a keen eye out for contamination given away by weird colours and smells. Pink and black are certainly not good, nor anything that smells like rot. Leave the infected jars unopened, put them in a plastic bag, and dispose of thoroughly. Even if you are unsure, please err on the side of caution and toss out any suspect cultures. Many moulds, mildews, and unwanted fungi can harm humans.
- The fluffy mycelium will thoroughly colonise each jar after 3–4 weeks. If six well-colonised jars still remain (half of your starting amount), you have done really well. When the mycelium has been observed to be well-established, leave it for another 7 days to guarantee a firm hold in the substrate.
- The cakes will now be ready to use.
STAGE 2
The whole inoculation to consolidation period takes about a month. At some point during that month, you are going to want to prepare somewhere for your mycelium cakes and future fungus to live. A shotgun fruiting chamber is an easy solution.
WHAT YOU WILL NEED FOR STAGE 2
- Mycelium cakes
- Perlite
HARDWARE FOR STAGE 2
- 50–110 litre clear plastic storage container
- Drill with ¼ inch (6mm) drill bit
- Spray misting bottle
- Break out the sterilising alcohol, gloves, and face masks again
HOW-TO FOR STAGE 2
- Take the plastic storage container; measuring 15cm from the bottom, drill holes on a 5x5cm grid on all four sides and the lid. Drill from the inside out onto a block of wood to prevent the plastic from cracking.
- Thoroughly clean the container inside and out with hot, soapy water, then wipe out with alcohol.
- Place a plastic sheet or even a flattened-out bin-liner or two where the fruiting chamber will go. Just in case of any floor-staining leakage.
- To ensure good airflow around the whole chamber, raise the container evenly on each corner so air can move underneath. Don’t use books or anything made of card as they may get damp and create mould.
- Using the strainer, rinse the perlite under running tap water. Set aside until all the excess water has drained off and then place into the bottom of the container.
- Repeat until a 10–15cm layer of perlite covers the base of the container.
FRUITING
- Fruiting is what it’s all about. It is when the psilocybin-rich rewards are reaped. It is a surprisingly rapid process once it has begun. The vegetating mycelium mass is the great achiever. The mushroom fruits are transient, beautiful, and bountiful.
- Firstly, “birth” the substrates or mycelium “cakes”. Upturn the jars onto a disinfected surface and tap their bottoms until the intact cake comes loose. Try to damage the cake as little as possible during every stage of preparation.
- Next, the cakes need to be rehydrated. Carefully wash each cake under cool, running tap water to remove any loose vermiculite.
- Fill the large saucepan or a large container with tepid water. Dunk the cakes into the water and keep them submerged for 24 hours at room temperature. They will want to float, so keep them under with another saucepan or similar.
- Remove the cakes from the water and place on a disinfected surface.
- Next, the cakes will need to be rolled. Fill a mixing bowl with fresh, dry vermiculite.
- Roll each cake in the dry vermiculite until completely covered. This will keep the moisture in. Vermiculite can hold 400% its dry weight in moisture.
- Next, the cakes are put into the grow chamber. Cut squares of tin foil large enough for the cakes to sit on without touching the perlite.
- Evenly distribute these on top of the perlite in the base of the chamber.
- Gently place a mycelium cake on each square, then mist the whole container gently with water.
- Fan with the lid several times before sealing the chamber.
THAR SHE GROWS
- Optimise conditions by misting the chamber four times a day to make sure the humidity stays high. Try to avoid getting the cakes wet directly.
- Use the lid to fan the chamber at least six times a day to ensure air circulation.
- Some growers use fluorescent lights on a 12-hour light/dark cycle. However, passive light is enough to tell the emerging shrooms in which direction to grow.
HERE COME THE MYCELI—YUM!
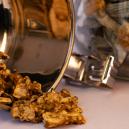
Soon, the cake will be spotted with small white bumps that quickly become “pins”. After 5–12 days, fully formed mushrooms will be ready for harvest.
It is best to harvest these fresh mind-fruits before the veil breaks and the pileus fully engorges. They will be light in colour, the caps will still have a conical shape, and the gills will still be covered.
Gently dry your harvest as dried mushrooms are substantially more psychoactive than fresh mushrooms. Use a fan rather than a heater and certainly keep them away from ovens and microwaves. Once they are satisfactorily dry, store them in a clean container somewhere cool and dark, or for indefinite life, keep them in the freezer.